

In many organization a common misconception is that DevOps is about the tools we use, so let’s use a second to read the citation from Microsoft.
DevOps brings together people, processes, and technology, automating software delivery to provide continuous value to your users.
Microsoft
Of course this post will not be about what DevOps is and isn’t, but I think it’s important refresh the citation once in a while. This post will however focus on how the tooling can help you automate the deployment of Data Factory from development to test environment, that can easily be transitioned to any other environments you may have.
For this purpose I have set up a GitHub repository, two resource groups (development and test) in Azure and a project in Azure DevOps.
Configuring our development environment
Firstly we need to create a data factory resource for our development environment that will be connected to the GitHub repository, and then the data factory for our testing environment. This can be done by using PowerShell, Azure CLI or manually from the Azure portal- pick your choosing, but remember to create it in their respective resource groups.
When the resources is successfully created, then navigate to the Data Factory Author & Monitor tool for development environment and click the Set up Code Repository icon.
This will prompt you to provide information about the repository that should be used for version control. Follow the configuration steps and click the save button when done.
Note! Be aware that if the repository is private within an organization on GitHub you might need to get the GitHub OAuth app for Data Factory approved.
Note! Another issue that can occur is when the code repository seem to be configured, but the data factory cannot show signs of version control being in place. The reason for this is often related to how the Azure subscription is setup and what role you have been assigned. The result is that the wizard cannot complete the necessary configuration.
If the configuration was successful the Data Factory has been configured to use the GitHub repository. Let’s create a sample pipeline that will be used during our deployment.
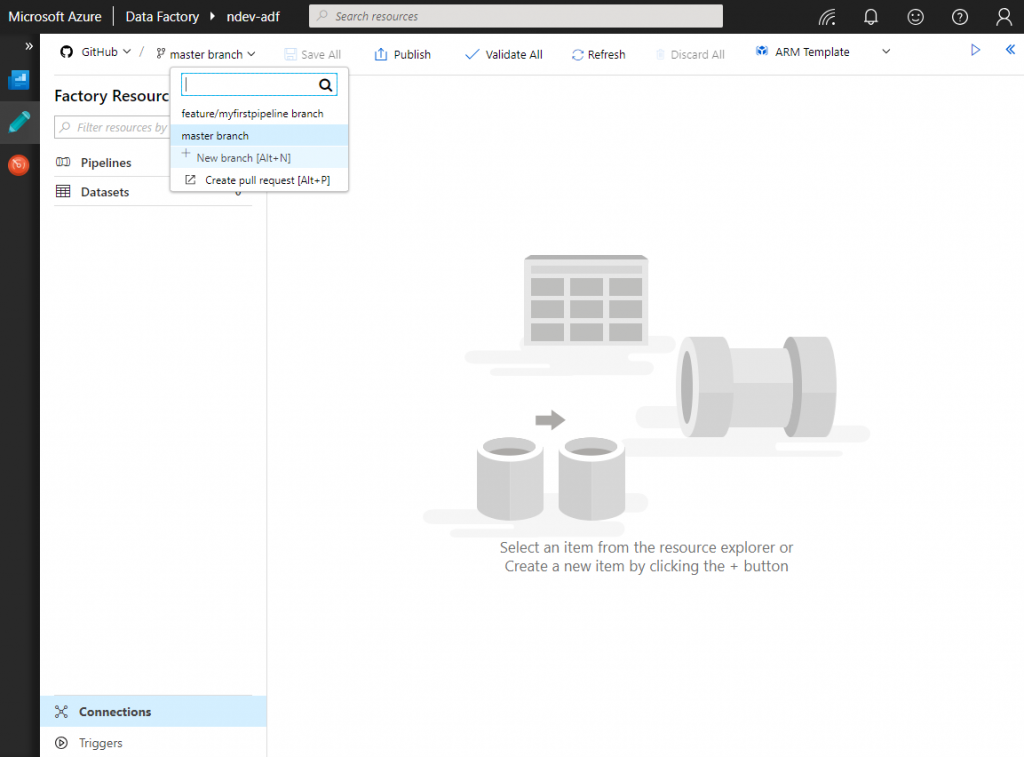
In the visual designer click on the name of the active branch and select the option New branch and follow the steps. This will generate a new branch in your GitHub repository and is where our development will be done. Take note that you can only debug pipelines that is not published.
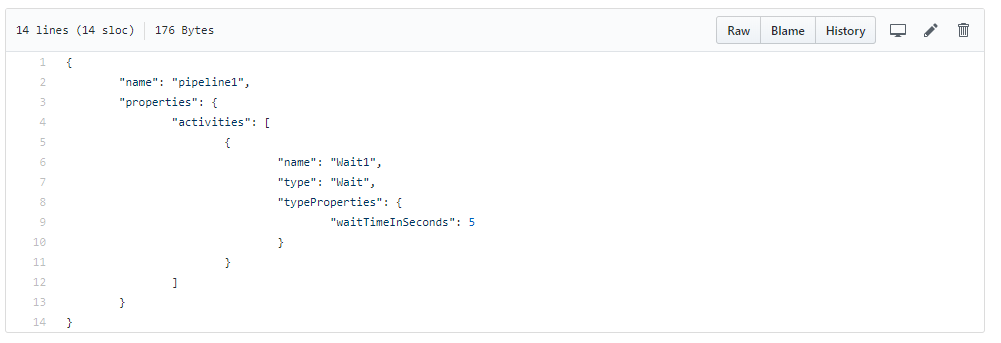
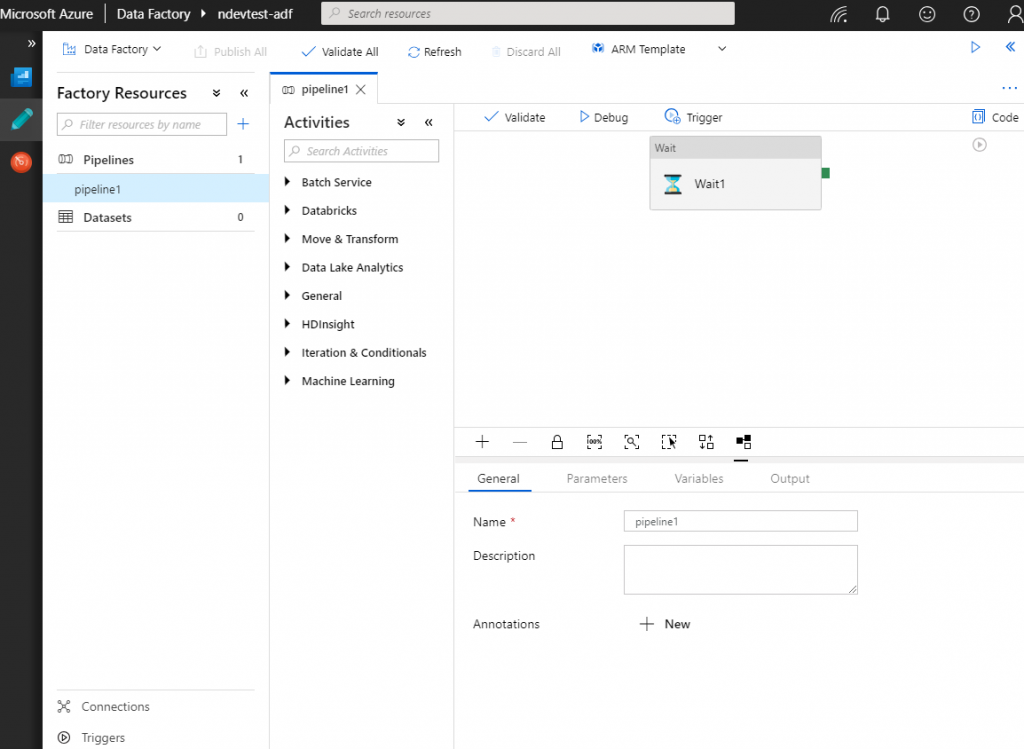
In the below image I have created a feature branch with the name myfirstpipeline that contains one pipeline with a wait activity. The below pipeline is saved to version control using the save all functionality and tested using the debug option.
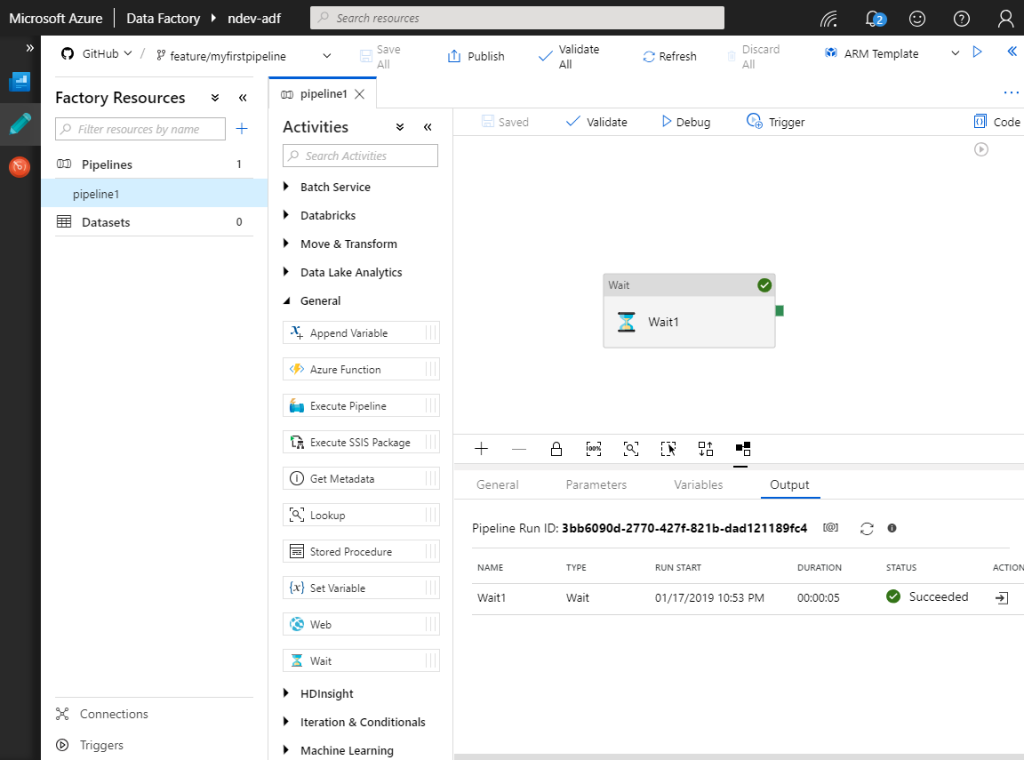
When something is saved using the visual designer, Data Factory will handle the interaction with the version control system and do necessary changes on the active branch.
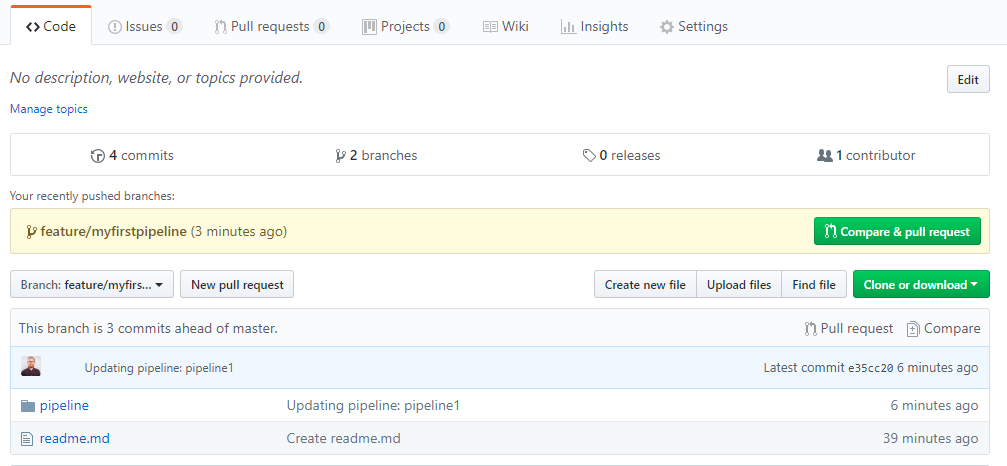
Diving into the folder for our pipelines you will find our newly created pipeline as a JSON file. This is how Data Factory store our definitions of pipelines, triggers, connections and so on.
Let’s skip a few steps and assume our team processes have been followed and everything is merged back to the master branch. The changes are now assumable ready to be promoted to our testing environment.
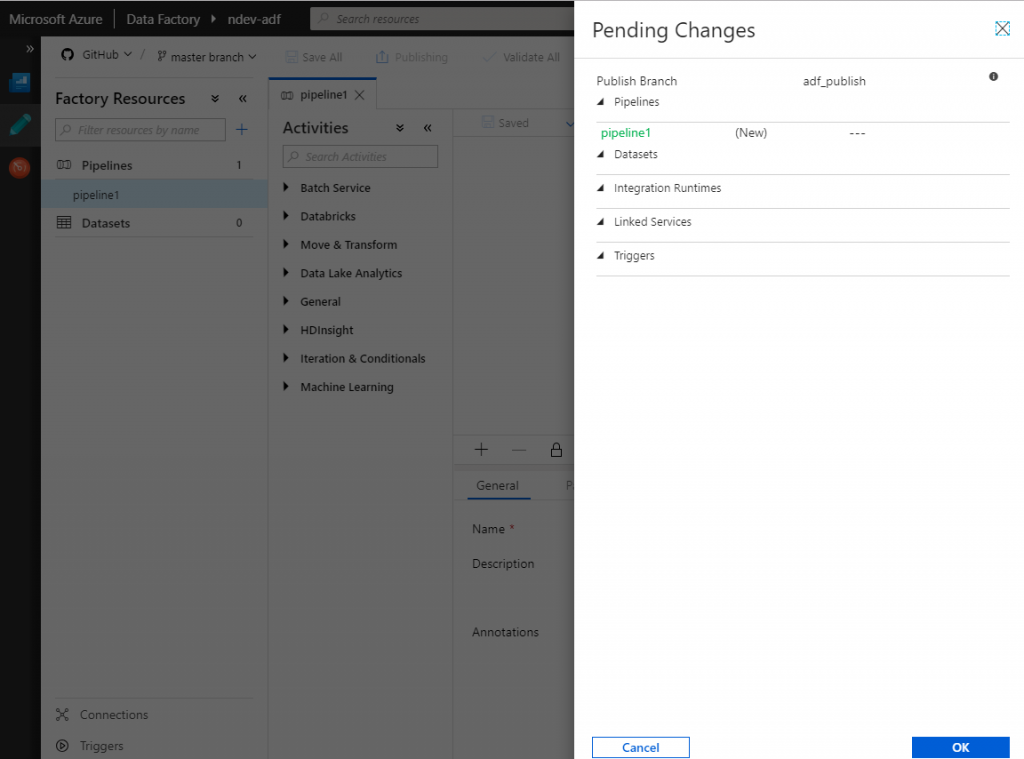
Clicking the publish button back in the visual designer will trigger the data factory to list pending changes that will be applied to the adf_publish branch. If the changes are approved, the branch will be updated with latest version of the source code. In GitHub the publish branch is non-mergable to master and will contain the ARM deployment templates. These templates will be used by Azure DevOps when deploying. Sadly clicking publish at this stage will not trigger any changes on our testing environment.
Configuring our Azure DevOps release pipeline
Having the development environment configured and all our changes stored to version control is crucial in order to enable automated deployments.
Navigate to your Azure DevOps project and create a release pipeline. Below I have created the release pipeline ndev-adf within the project with the same name.
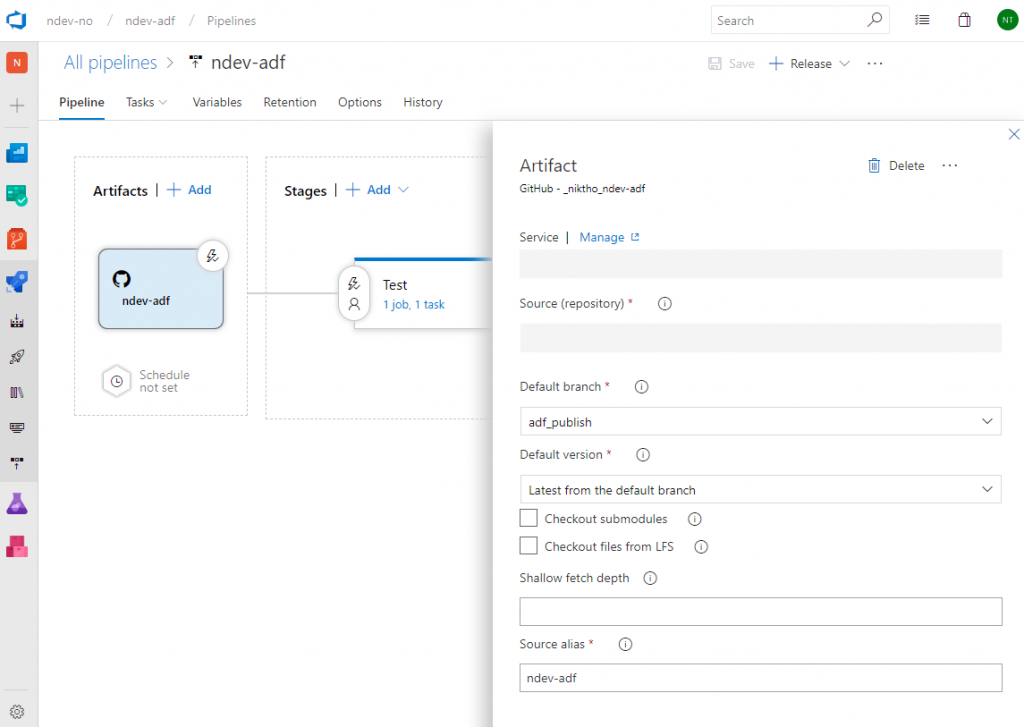
The first step needed is to define where our release pipeline will pick up it’s artifacts. Click the add button and choose the appropriate service connection and repository. The default branch must be adf_publish as this is where the Data Factory will generate the ARM templates.
When the artifact source is defined we want to enable continuous deployment for each time we publish our changes. Click the lightning button on the artifact source and enable the trigger. I also like to specify the branch filter in case something is changed on the artifact source. Click the save button to store the changes.

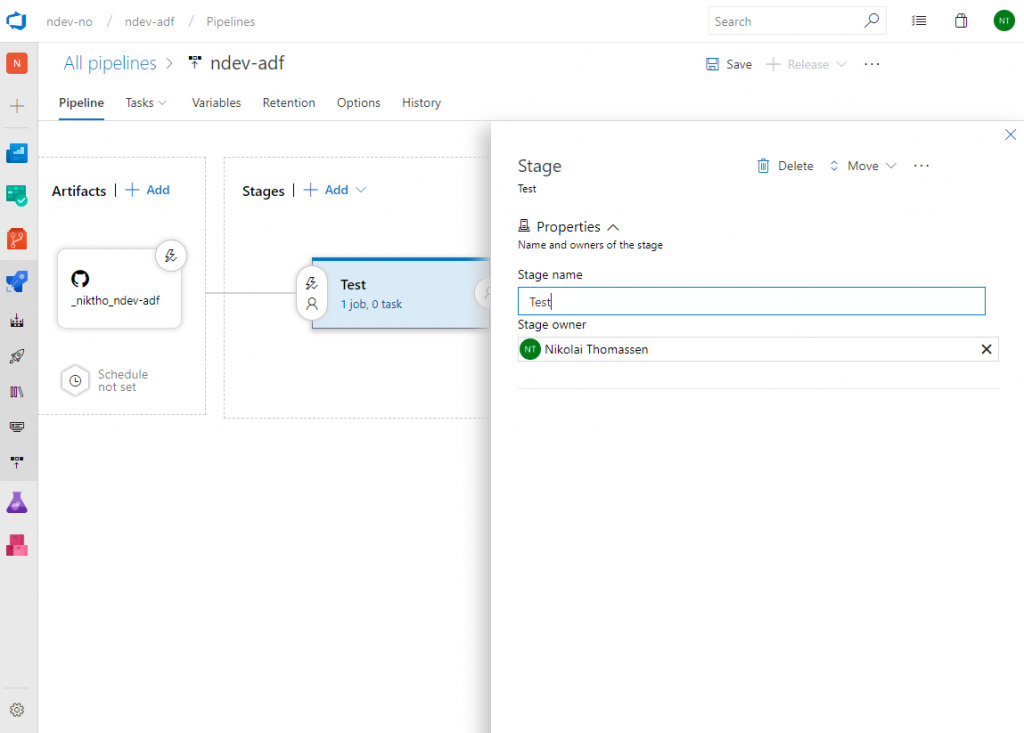
Let’s create the deployment stage that will be responsible for publishing changes to our test environment. Click the add button in the Stages window and choose that you want to start with an Empty job. Name the stage Test and click the menu option Tasks in order to see the details.
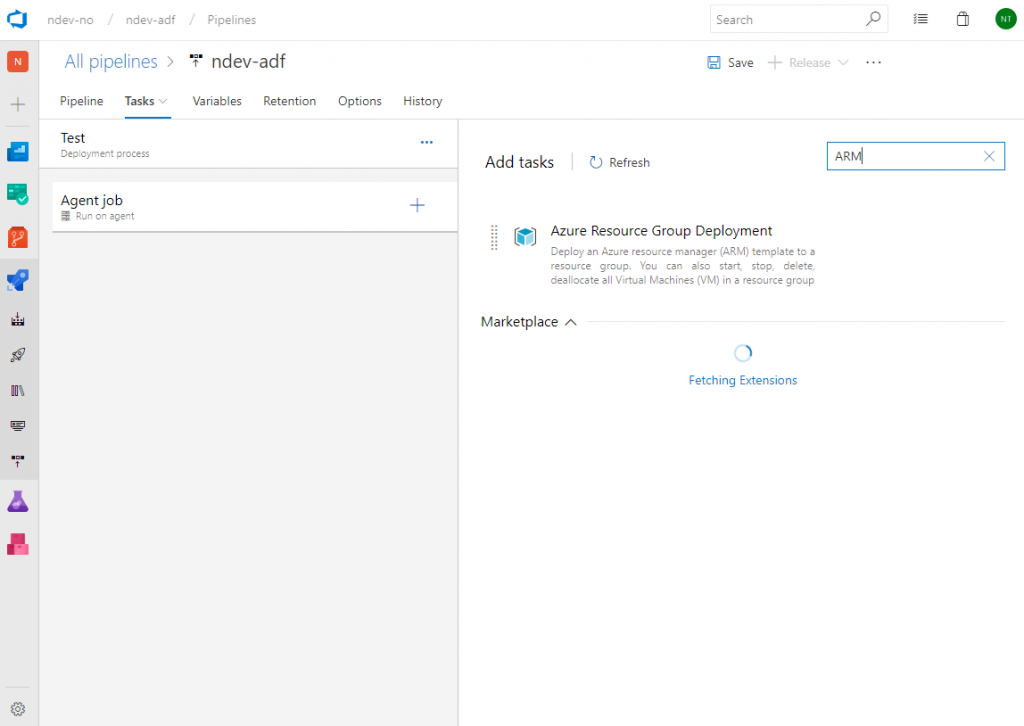
We then need to add a task to our agent job that will perform the deployment. On the agent job click the plus sign and search for ARM. This will give you the option of adding Azure Resource Group Deployment task. Add the task.
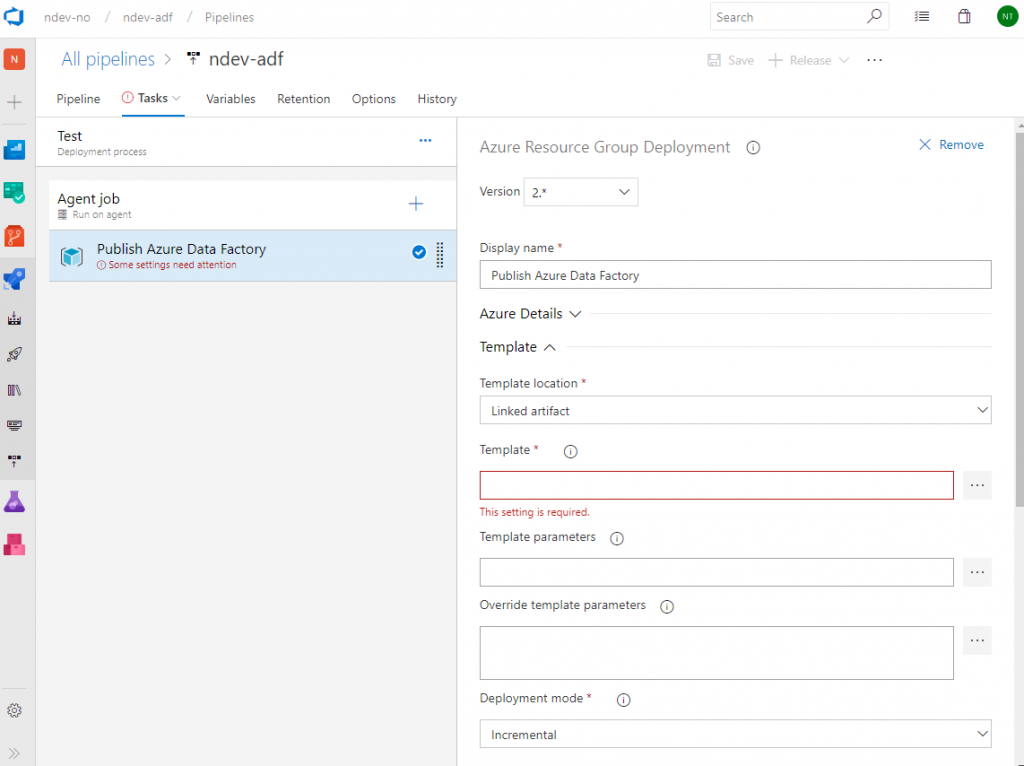
Provide the task with a readable display name and the Azure details for where you are going perform the deployment. As we can see in the below image it’s required that we provide a reference to a ARM template. In our case we want to add a reference to the template within the adf_publish branch.
Click on the open details button and select the file ARMTemplateForFactory.json before clicking the OK button.
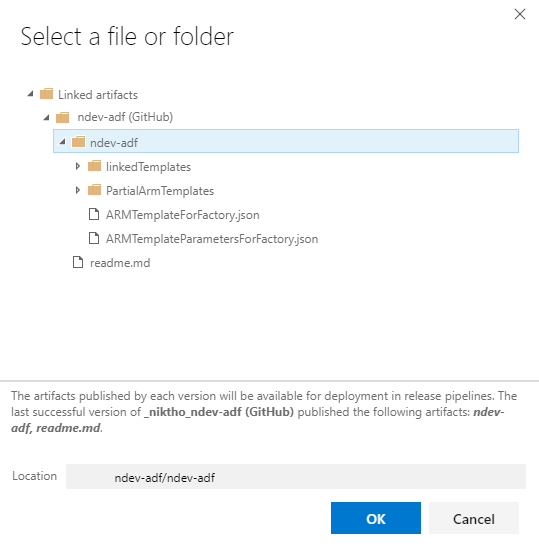
Do the same steps for adding the template parameters file to the task. This will allow us to override template parameters like the data factory name. The name is required in order for the resource template to know what resource to update.
The last step is to choose that the task should have a deployment mode of incremental. Click the save button when done.
To test our newly created pipeline click the Release menu option and choose Create a release. When done you can follow the deployment status from the release view. If everything was deployed successfully the stage will be marked as green.

If we navigate to our data factory in test environment we can now see the published changes.
Note! As you probably remember we enabled continuous deployment based on changes in the adf_publish branch, meaning that if you go back to the development environment and do a change that is then published – it will automatically be deployed to the test environment.
Summary
This post touched briefly upon the deployment of Data Factory from a development to test environment using GitHub as version control system.
As you develop data factory pipelines you will most like face questions like
- How do I update active triggers?
- Why isn’t the deployment deleting removed elements?
- How can I best manage connection strings, keys and secrets?
The documentation on the Microsoft website is a good place to start and gives you answer on some of the questions above.
Really nice explanation. I would like to add one more point of disabling triggers before deployment and add it back once deployment complete as a part of release setup.
Yes, you are absolutely correct! Handling the state of the triggers is a must during release and can be done using PowerShell scripting as pre release and post release steps on the stage in the pipeline.
Thanks for this useful blog.
I have a couple of questions regarding the usage of repositories with Azure Data Factory (ADF). I am thinking of implementing CI/CD for ADF with my local GitLab repository.
1. Is there any way to use a GitLab repository with ADF ?
2. If yes, how do we configure the ADF to use another publish branch instead of the adf_publish ?
Any help would be of great value. Thanks
Hi Zeeshan,
I don’t think ADF supports GitLab at the moment, but if that is an important feature for you, then I recommend that you give a feedback to the development team at https://feedback.azure.com/forums/270578-data-factory. If you want to automate the deployment pipeline without writing all the scripts then GitHub or Git in Azure DevOps are your only option.
However you could manually export the whole ARM template (or script it?) each time you want to deploy and push it to your GitLab repository so it trigger your release pipeline. I assume that it’s not an ideal solution as you will loose the visual authoring feature that enables testing changes before exposing it to other team members.
Using the default repository connector for data factory don’t allow you do change the publish branch as far I know, but it may come in the future if people are providing feedback to the Microsoft product team 🙂
Very nice article!. A small clarification though, If we have multiple pipelines would it be possible to deploy only a subset of them rather deploying all pipelines?
Thank you! Currently I don’t think this is an option by default, but you may come around if you do some scripting? Myself would keep pipelines not ready for deployment to production in their respective feature branch, and use the debug option to test and verify the implementation before finally merging back to the master branch. Could that be an option, and would it resolve your case?
Hi, how would we go about having different trigger schedules per environment? (I dont want dev and test to run every hour, but production does). Possibly, I could add 3 triggers (main, mainDev, mainTest) to each solution, and disable/enable those triggers using powershell, after deployment, but rather i would have 1 trigger (main) with a different schedule. So, maybe NOT deploy triggers and control them manually?
Hi Derek,
I don’t think there is a good way on handling these cases today, but haven’t checked in a while to be honest. Tumbling Window triggers need for example to be dropped and recreated in order to change the schedule or start time, that cause some challenges. However, I would look into writing a script that modifies your ARM template based on the environment you are deploying to, maybe an additional configuration file with trigger name and schedule? It’s unfortunately the answer I have today.
Hi Nikolai, thanks for this, i keep getting this error message “ResourceNotFound”. I have tried in various environments of mine, and the same message appears. Would you have any idea?
the full message is: 2019-10-02T16:04:00.8871026Z ##[error]At least one resource deployment operation failed. Please list deployment operations for details. Please see https://aka.ms/arm-debug for usage details.
2019-10-02T16:04:00.8880957Z ##[error]Details:
2019-10-02T16:04:00.8881425Z ##[error]NotFound: {
“error”: {
“code”: “ResourceNotFound”,
“message”: “The Resource ‘Microsoft.DataFactory/factories/htTestDF’ under resource group ‘xxx_rg’ was not found.”
}
}
Hi Henry,
A bit hard to give you an answer on this based on the information given, but how are you doing deployments? Have you created the data factory beforehand? Else you probably need to change some ARM deployment settings if I remember correct.
Hi! I’m having a lot of problems to connect the ADF to a private repo in a github enterprise account. Do you have any tutorials on how to set up the oauth?
Thanks!
Hi Andre,
I struggled with the same myself last year. Make sure that data factory is authorized and approved by your organization. Can see if I can make a tutorial on it, of course!